Latest Posts

Showing posts with label Graphic. Show all posts

Convert any Website Into 3D Website Visualization with Tilt Firefox Extension

Tilt is a fun new Firefox extension focused on creating a 3D visualization of a webpage, drawn using WebGL. Since the DOM is essentially a tree-like representation of a document, this tool layers each node based on the nesting in the tree, creating stacks of elements, each having a corresponding depth and being textured according to the webpage rendering.


Various information besides the actual contents will be displayed on request, regarding each node’s type, class, id, and other attributes if available. The rendering will be dynamic, in-browser, using WebGL and GLSL shaders.

Tilt also offers the possibility of inspecting the html, css, and attributes of each node in the DOM tree, refreshes its contents if the webpage has been modified with other tools such as Firebug, and exporting the webpage to a 3D mesh or a screenshot.

For Addons

For compatibility, this add-on will require WebGL capabilities. Go to http://get.webgl.org/ to check availability and troubleshoot any issues.

To start Tilt, hit Control+Shift+M (or Command+Shift+M if you're on Mac OS, or go to Web Developer -> Tilt, available in the Firefox application menu (or the Tools menu on Mac OS). You can change this hotkey from the Options menu inside Tilt.


Tilt 3D 1.0.1

by Victor Porofrobcee

A WebGL-based 3D visualization of a webpage.

Leave a Comment Read More

How to Add Slider Notification Widget in Blogger


SlideNote is a jQuery Plugin to Display Sliding Notifications in your blogger blogs and websites etc. Displaying sliding notification Notes as a Widget on your blog is a great way to showcase the stuff which you think your readers should notice. You might have noticed that many popular blogs are having that kind of sliding notifications area visible as you scroll the page towards the bottom of the page, and it goes invisible when you are at the top of the page.
Add Slider Notification in Blogger using SlideNote
SlideNote is a customizable, flexible jQuery plugin that makes it easy to display sliding notifications on your website or in your web application. SlideNote is compatible with jQuery 1.4.3 and current versions of major browsers. IE8 is the only version of Internet Explorer that is officially supported. I have tried to make it available for blogger users as a gadget, lets move ahead and see how we can add this wonderful widget in your blog. 


Steps to Add Slider Notification Widget in Blogger
Note: Before making any changes to your template, take a full backup of your blogger template.

#Step 1. Log in to your Blogger Dashboard and Navigate to Design> Edit HTML.
Design Edit HTML


#Step 2. Include SlideNote in the header of your page. Make sure it is included after jQuery.

- Copy below code and paste it just before the </head> tag.
<script src="http://ajax.googleapis.com/ajax/libs/jquery/1.4.2/jquery.min.js" type="text/javascript"></script>
<script src="https://sites.google.com/site/bloggerhowto/blogger-how-to/jquery.slidenote.min.js" type="text/javascript"></script>

#Step 3. Copy below code and paste it just 
before the ]]></b:skin>.
/* ----- LinkToHow.Blogspot.com CSS START------ */
.slidenote { width: 540px; height: 140px; background: #FBEC78; padding: 1em;
-moz-box-shadow: -0.2em -0.2em 0.7em #333; -webkit-box-shadow: -0.2em -0.2em 0.7em #333;}
.slidenote img { float: left; margin-left: -2em; margin-top: -2em; }
.slidenote img:hover { margin-top: -1.95em; }
/* ----- LinkToHow.Blogspot.com CSS END------ */


#Step 4. Now Copy below code and paste it just before the </body> tag.
<!-- Notification Slider Start -->
<div class='slidenote' id='note'>
<div id='container'>
<h2>Blogger How to Tips</h2>
<span><em>Get All Blogger and Blogspot Related Tips !!! :) </em></span>
<p>Visit now : <a href='http://
prohackersden.blogspot.com/'>http:// prohackersden .blogspot.com/</a> and learn ... <br/><a href='http:// prohackersden .blogspot.com/'>LinkToHow</a> | <a
href='http://
prohackersden .blogspot.com/'> prohackersden </a></p>
</div>
</div>
<script type='text/javascript'>
$(&#39;#note&#39;).slideNote({
closeImage: &#39;https://blogger.googleusercontent.com/img/b/R29vZ2xl/AVvXsEjWFdw33LimlaedfYfMfYq5A6llfeST4m7GeaknbRvVah-TB46OWgagDq3bufiwyjtaq6MUblBHgZp6Bc197WxobuL1FFtS4ZNDd6w06n7u4Ww4CUAp4EpyowBXRDwmhc1e7j79dBxAYPH_/s1600/slidenote.close.png&#39;
});
</script>
<!-- Notification Slider Ends -->


#Step 5. Save Template and done!. You can change the value of CSS classes as per your need. Scroll down the page to the bottom of the page and you will see the notification.
Download the full plugin including the un-minified source code, demo page, README, and sample stylesheet :http://slidenote.info/download/jquery.slidenote.zip

SlideNote Options

SlideNote offers a set of five options that allow you to modify the behavior and/or content of the script.
  • where specifies how far down the user must scroll before the notification slides into view.
  • corner controls from which side of the screen the notification will slide in.
  • URL tells SlideNote from where to pull the data to use as the content of the notification. If no container is specified, then the entire page will be used.
  • container is to be used in conjunction with URL. When specified, it will only pull content from the element having the specified ID from the specified URL.
  • closeImage displays the image at the specified URL. When clicked, it will slide the note out of view. The note will not display until the next time the user scrolls passed the wherevalue.
Leave a Comment Read More

How To Add JQuery Pop-Up For Facebook Like Box in Blogger


  •  Login to blogger and go to Design-->Edit HTML
  • Search for the tag </head> ( Using CTRL + F )
  • Copy n paste below code just above it


<script src='http://ajax.googleapis.com/ajax/libs/jquery/1.5/jquery.min.js'></script>
<script src="https://sites.google.com/site/topbloggerinworld/colorbox-min.js"></script>
<link rel="stylesheet" href="https://sites.google.com/site/topbloggerinworld/fbpopup.css" type="text/css" />
<script type="text/javascript">
    jQuery(document).ready(function(){
       if (document.cookie.indexOf('visited=flase') == -1) {
           var fifteenDays = 1000*60*60*24*30;
           var expires = new Date((new Date()).valueOf() + fifteenDays);
           document.cookie = "visited=true;expires=" + expires.toUTCString();
       $.colorbox({width:"600px", inline:true, href:"#mdfb"});
           }
    });
    </script>
Now save your template
Adding HTML Code

In your blogger --->Design--->Page elements--->Add a gadget
Choose HTML/Javascript From list
Copy n paste below HTML code into it

<div style='display:none'>
       <div id='mdfb' style='padding:10px; background:#fff;'>         
<center>
<table align="center" background="https://blogger.googleusercontent.com/img/b/R29vZ2xl/AVvXsEiVQMVMxu6D9TPARAUTX9eQNS7_UZc3yesfe_Hq0uC-SUzeZmwXxiJfq6cTk58D6Hi0cL6yrrZcmB4uTU-Pu-9sN3qSipXf6LHSTsKZs3lxI0ilyOhhK61EkmD1KSLbOntvHNxZdR8qMflb/s1600/adsense+background+image%2528linktohow.blogspot.com.jpg.png" border="0" height="300" style="width: 505px;"><tbody>
<tr><td height="345" width="505">
<div align="right">
<script src="http://static.ak.connect.facebook.com/js/api_lib/v0.4/FeatureLoader.js.php" type="text/javascript"></script> 
<script type="text/javascript">FB.init("32eb3732082b27e7c314feb421a56208");</script> 
<fb:fan profile_id="197027040378524" connections="10" width="360" height="270" css="https://sites.google.com/site/topbloggerinworld/mdfacebook.css"></fb:fan>
</div></td></tr></tbody></table></center>
<p style=" float:right;  margin-right:35px;  font-size:9px;" >Powered By <a style=" font-size:9px; color:#3B78CD; text-decoration:none;" href="http://www.Prohackersden.blogspot.com">Blogger Widgets</a></p>
</div></div>

Edit
Replace in above red colored number with your facebook page id
Now save the widget and you have done !!!

Drop Your Comments and Question below :) 
Leave a Comment Read More

How To Add 4 In 1 Social Sharing Floating Widget To Blogger


First If you are new here then kindly read my previous versions first so that you may have a clear idea on how this widget works and how can you customize it.
And now I’m Back here With 4 In 1 Social Share sliding pop out widget Using jQuery ,
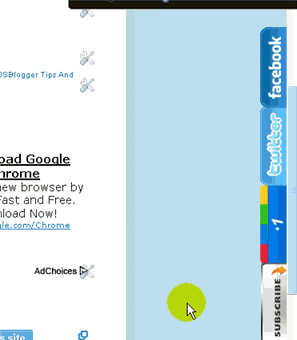
and it's not only for facebook like box , but here you will also see your twitter widget sliding same like facebook like box , similarly for the google +1and Subscribe Popup form ,this look much useful and cute on it slide on your blog , live at a side of your blog when some one over his/her mouse over it , it pop up with a cute sliding effect , the Jquery effect , 
so ...let see how to get this.
  • Go To Blogger>>>Design>>>Edit HTML
  • Tick Expand Widget Template
  • Search For The Tag </head> (Using ctrl + f )
  • Copy n Paste Below Code Before </head>

<link rel="stylesheet" href="https://sites.google.com/site/topbloggerinworld/linktohow/multipopoutwidget.css"/>
<script type="text/javascript" src="http://ajax.googleapis.com/ajax/libs/jquery/1.4.2/jquery.min.js"></script>
<script type="text/javascript" src="http://apis.google.com/js/plusone.js"></script>
<script type="text/javascript">
jQuery(document).ready(function(){
 jQuery("#facebook_right").hover(function(){ jQuery(this).stop(true,false).animate({right:  0}, 500); },function(){ jQuery("#facebook_right").stop(true,false).animate({right: -200}, 500); });    jQuery("#twitter_right").hover(function(){ jQuery(this).stop(true,false).animate({right:  0}, 500); },function(){ jQuery("#twitter_right").stop(true,false).animate({right: -250}, 500); });     jQuery("#google_plus_right").hover(function(){ jQuery(this).stop(true,false).animate({right:  0}, 500); },function(){ jQuery("#google_plus_right").stop(true,false).animate({right: -154}, 500); });    jQuery("#feedburner_right").hover(function(){ jQuery(this).stop(true,false).animate({right:  0}, 500); },function(){ jQuery("#feedburner_right").stop(true,false).animate({right: -303}, 500); });    });
</script>

Note :- CTRL + F To Find Above Red jQuery Plugin URL In Your Template If You Have Already This Plugin Than Remove It .

  • Save Your Template


Now Adding HTML Code It's Simple

  • Go to Blogger>>Design>>>Add a Gadget 
  • Choose HTML/Javascript 
  • Copy n paste below HTML code Into It,


<div id="on">
    <div id="facebook_right" style="top: 18%;">
        <div id="facebook_div">
            <img src="https://blogger.googleusercontent.com/img/b/R29vZ2xl/AVvXsEiaB5WiHgxEjBVa_q1E8IkGVq8JyLZGoWcHsNOisvi1oiMoXD44TbF9Fxy8a7HZW2YnhbAdnm-oHEEwktstiUclzCRfcOgw2Thsa2sQQRFrlcT-mohmcUmqJ_bl5ZfsRFn3RmUMPnPrDsGa/s1600/%255Blinktohow.blogspot.com%255Dfacebook_right.png" alt="" />


            <iframe src="http://www.facebook.com/plugins/likebox.php?href=http://facebook.com/prohackersden&amp;locale=en_GB&amp;width=246&amp;connections=9&amp;stream=&amp;header=false&amp;show_faces=0&amp;height=356"   scrolling="no"></iframe>
        </div>
    </div>
</div>
<div id="on">
    <div id="twitter_right" style="top: 35%;">
        <div id="twitter_div">
            <img id="twitter_right_img" src="https://blogger.googleusercontent.com/img/b/R29vZ2xl/AVvXsEh1ro-X4NAnCULQR1_YnewXoELxqoh_9QF2DgClOE_EwkLhaednU4xN6n9Z4Kexkrjvu4I6R3lYYu2dg4OBrXkRfm_dJkICV-IL4xB9nRKtV80cJIBQXFuc4V2kz2yf8sJnF_uR4lGnTm-S/s1600/%255Bwww.linktohow.blogspot.com%255Dtwitter_right.png" />
            <script src="http://widgets.twimg.com/j/2/widget.js"></script>
            <script>
                new TWTR.Widget({
                version: 2,
                type: 'profile',
                rpp: 4,
                interval: 1000,
                width: 246,
                height: 265,
                theme: {
                shell: {
                background: '#63BEFD',
                color: '#FFFFFF'
                },
                tweets: {
                background: '#FFFFFF',
                color: '#000000',
                links: '#47a61e'}
                },
                features: {
                loop: false,live: true,
                scrollbar: false,hashtags: false,timestamp: true,avatars: true,behavior: 'all'                  }
                }).render().setUser('prohackersden').start();
            </script>
        </div>
    </div>
</div>
<div id="on">
    <div id="google_plus_right" style="top: 52%;">
        <div id="google_plus_div">
            <img id="google_plus_right_img" src="https://blogger.googleusercontent.com/img/b/R29vZ2xl/AVvXsEjkIfUQpoy1pChCRtSbdvRgqFTukfcElFjkKcYLo1LfQs-Si46jixKUsJspAoBk7ZkTgQLw7O4hk3LdohihDZcmkUh-D2B_rrO_q4P2iK5jZ1DX1DLklNAFjdnvKmU-f7xpttf358HpgPM7/s1600/%255Bwww.linktohow.blogspot.com%255Dgoogle_plus_right.png" />
            <div style="float:left;margin:10px 10px 10px 0;"><g:plusone size="tall" expr:href="data:post.url"></g:plusone></div>
    </div>
</div>
<div id="on">
    <div id="feedburner_right" style=" top: 69%;">
        <div id="knfeedburner_div">
<center>
<h4 style="color:#F66303;">You can also receive Free Email Updates:</h4>
            <form action="http://feedburner.google.com/fb/a/mailverify" method="post" target="popupwindow" onsubmit="window.open('http://feedburner.google.com/fb/a/mailverify?uri=prohackersden', 'popupwindow', 'scrollbars=yes,width=550,height=520');return true"><input gtbfieldid="10" class="enteryouremail" name="email" value="Enter your email here..." onblur="if (this.value == &#39;&#39;) {this.value = &#39;Enter your email here...&#39;;}" onfocus="if (this.value == &#39;Enter your email here...&#39;) {this.value = &#39;&#39;;}" type="text" /><input value="prohackersden" name="uri" type="hidden" /><input value="Submit" class="submitbutton" type="submit" /></form></center>


            <img id="feedburner_right_img" src="https://blogger.googleusercontent.com/img/b/R29vZ2xl/AVvXsEheozFsPgx13NmKu4XeVXbwtpySvhpDkrpEvKl-jsboved_STkAag5uE41VMDzuT-a0jZ7zoVilvLNq4_zbDKVlB8oV73SxCyaMOOc7cBlVbNfbt99bF8TyJoLnoWNGANJzMcy7c3nlrzKX/s1600/%255Bwww.linktohow.blogspot.com%255Dfeedburner_right.png" />
        </div>
    </div>
</div></div>

Note:- Replace In Above Code
1. linktohow With Your Facebook User name
2. linktohow With Your Twitter User name
3. LinktoHow With Your Feed Title

  • Save the widget and drag the widget anywhere on your right sidebar. Place it below all widgets on your right sidebar 
  • Finally Click the orange save button towards top right.
  • And that’s all!
  • I hope you like and enjoy it!
comment please

Leave a Comment Read More

ZOOMING IMAGE PLUGIN


Sometime ,we need a bigger and detailed version of an image ,but size of image is limited by post frame . So we can do a zoom function for image . For example ,you have a blog that selling children apparel . Because of the limitation of post frame ,if we add a big image ,it will break out the layout .If we add a small size image ,it's hard for buyer to see product in detail . It's time for zooming function .


Download

Installing this script is not different to lightbox effect .
Now let's start
1,Download the script files and upload to your hosting . This step is required because I have no hosting in hand now .

2,Now add these line bellow before <body>

<link href="/styles/cloud-zoom.css" rel="stylesheet" type="text/css" />

<script type="text/javascript" src="http://ajax.googleapis.com/ajax/libs/jquery/1.4.2/jquery.min.js"></script>

<script type="text/JavaScript" src="/js/cloud-zoom.1.0.2.min.js"></script>

3,How to use
In blog posting window ,after inserting image ,click on edit HTML ,and edit the HTML code of image to this form

<a href="bigimage.jpg" class="cloud-zoom" rel="option goes here .........">
            <img  src="smallimage.jpg" title="Optional title display" >
        </a>

Bigimage.JPG is the big and detail version of image
Smallimage.JPG is the small version of image
Class 'cloud-zoom' is required .


4,If your blog has a line for calling jquery framework ,do not add more
<script type='text/javascript' src='js/jquery.js'></script>
because more than one jquery calling can make all script stop .

5,Options can be set by adding into rel attribute . I marked where to put option by the text "option go here" in the step 3 . Each option is separated by a comma ( , ) .

Here is the list of options 

  • zoomWidth : The width of the zoom window in pixels. If 'auto' is specified, the width will be the same as the small image .
  • zoomHeight : The height of the zoom window in pixels. If 'auto' is specified, the height will be the same as the small image.
  • position : Specifies the position of the zoom window relative to the small image. Allowable values are 'left', 'right', 'top', 'bottom', 'inside' or you can specifiy the id of an html element to place the zoom window in e.g. position: 'element1'
  • adjustX : Allows you to fine tune the x-position of the zoom window in pixels.
  • adjustY :  Allows you to fine tune the y-position of the zoom window in pixels.
  • tint Specifies a tint colour which will cover the small image. Colours should be specified in hex format, e.g. '#aa00aa'. Does not work with softFocus.
  • tintOpacity :  Opacity of the tint, where 0 is fully transparent, and 1 is fully opaque .
  • lensOpacity :  Opacity of the lens mouse pointer, where 0 is fully transparent, and 1 is fully opaque. In tint and soft-focus modes, it will always be transparent.
  • softFocus : Applies a subtle blur effect to the small image. Set to true or false. Does not work with tint.
  • smoothMove : Amount of smoothness/drift of the zoom image as it moves. The higher the number, the smoother/more drifty the movement will be. 1 = no smoothing.
  • showTitle : Shows the title tag of the image. True or false. true
  • titleOpacity : Specifies the opacity of the title if displayed, where 0 is fully transparent, and 1 is fully opaque. 
That's all for zooming . I hope it helpful to you .  


    Leave a Comment Read More